Tuesday, November 16, 2010

Louis the Third
Louis the Third, by Jessica Snow


I thought this was so much fun!
I have become a fan of 20x200.com this website features some of the new upcoming famous artists.  It also shows some great photography as well, but I like the art better. You knew that already.  Anyhow, if you are interested in checking it out and taking a little looksie, here you go! Have fun.


The artist featured above has many prints that are very fun and colorful.
Below are some more from her.


Curvilinear Time
Curvilinear Time


In One Ear, Out the Other


Cascade
Cascade


Links to Use

 If you find that I am doing a lousy job at teaching you exactly how to teach color I found a link that has free power point presentations right here. Check it out and see if it helps.

Different terms of color if needed are further explained here.

If you still feel a bit in the dark go here.  I looked at some of the art on here and I should warn you they posted art from some famous artists, now you must know that those famous artists sometimes use nudes.

Tie Dye

I was reading this morning in a little book that I have titled
  The Everything Book for Teachers of Young Children 
and I found something fun to share.

Thinking Thanksgiving. 


Tie Dyes

Make your own dyes using natural materials as Indians used to do.
For yellow use saffron, crocuses, daffodils or yellow onionskins.
For green use young grass, broccoli, or spinach.
For blue use blueberries.
For red use beets.
For brown use coffee, tea or walnut shells.

Place in an enamel pot and cover with water.  Boil 5 minutes (longer to make colors darker). Strain through a colander.  Cool.  Cut or tear pieces of white cotton (from an old sheet or t-shirt). Have children dip cloth in colors.  

I just thought that some of you might enjoy doing this as a project.  This is wonderful to work in with colors.  If you just did the red, yellow and blue, it could show the students what and how secondary colors are made.
In my speech class in high school a fellow student gave his demonstration speech on how to tie dye and I thought it was beautiful.  This could make a really cool quilt-like display for our Art Show coming in the spring.  


Wednesday, November 10, 2010

Assignment Ideas for Color

Idea #1. Colorful Ornaments
Last year I made salt dough ornaments and let the children paint them with their own designs.  I love seeing what they come up with.  This year I was thinking we could make a simple shape ornament with a cookie cutter or cup, then letting them use the idea of painting complementary colors next to each other in a design to intensify the brightness of the colors. Make sure to have an example you have made.


The recipe for the salt dough is:
8 cups of flour
3 cups of water
2 cups of salt
 Mix the flour and salt, add water, mix and knead until soft. (this takes muscle) Roll dough to about 1/4 inch thick. Cut your shapes, and use a straw or pencil to make a hole for the string.  Bake for 1 hour on an ungreased cookie sheet at 300, or place on wax paper and let them dry over night.  The time when baked varies depending on the thickness.


Idea #2.
student art example: O'Keeffe

After giving each child a piece of paper ask them do draw with only a black crayon something specific. (this could come from a book they have been studying or even a holiday refrence like a cornicopia or something that they would like to invent.  Talk to the teacher and see what they say.) Then have the children wet down their entire page and then water color all of the paper with only red, yellow and blue.


For more colorful art ideas your children can do CLICK HERE.

The Color Wheel


Teaching the color wheel is an excellent way to really help your student get a great understanding on the importance of color.  
A basic color wheel would be best for your younger children, and the tertiary color wheel is more advanced.  
When teaching about color to first graders once, I went into the class with glass jars and mixed colors in them for the whole class to see.  I used the teachers overhead projector to enable all the students to see what colors could be made.  It was really beautiful.  This idea came from the book How to Teach Art to Children on page 33.  In that same book there is both color wheels for you to copy so that each child could fill out their copy with you as you mix colors. 
I also have wanted to try to teach color mixing with students by using play dough.  It would be really fun to see them have a tangible experience on how color can change in their fingers.  (I have a great homemade play dough recipe if you need it.)


Contrast in Color


"Related to the idea of color changing with the light, one other color phenomenon is important: our perception of colors changes according to their surroundings.  Even in the same light, a color will appear different depending on the colors that are adjacent to it.  Rarely do we see a color by itself.  Normally colors are seen in conjunction with others and the visual differences are often amazing." Design Basics, fourth edition, pg. 227.


A great way to teach this to student is to try to show them contrasting colors.
In the book How to Teach Art to Children, on page 40  there is a great lesson.
I have put it below.


The Background Makes a Difference
Contrast is the degree of difference between colors or tones in a piece of artwork.

Materials needed:
-a basket of small colorful objects
-colored construction paper

Step by Step
\1. Students choose an item and lay it on a colored background.
2. Students change the background to see if one color presents the item in a better way.  Which combinations of color have the best contrast?
3. Students explain which color is their favorite and why they chose it.


Color in a Different Light

It sure seems like forever since I have posted anything.  

This month I plan on highlighting the art element of Color.  


"Color is a product of light.  Therefore as light changes, the color we observe will change.  What color is grass?  Green?  Grass may be almost gray at dawn, yellow-green at noon, and blue-black at midnight.  The colors of things are constantly changing with the light. " Design Basics, fourth edition, pg. 227.

You can see this in Monet 's  paintings The Houses of Parliment


I think you could do almost anything with this, but you can count on me giving a few ideas.  


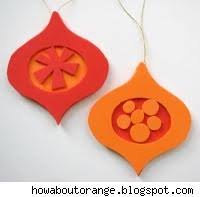
As an Art Mom I have been asked to help make a gift for my students so that they can take something home to their parents for Christmas.  Ornaments are a favorite idea and you could do almost anything to create an ornament.  The fun thing about ornaments is the fact that they could really become an heirloom for the family.  I love to look at different Christmas trees to see what really makes them up.  It says so much about the people that live in the home.  Christmas is a great time to incorporate color as well.  We are going to have a lot of fun. Are you excited yet?


Below I have pasted a couple of ideas from Family Fun magazine.  These are some things that I am itching to try with my students. In reading about how color changes with light, I thought these would be appropriate. 


Stained Glass

Stained Glass
  • rated star 1 rated star 2 rated star 3 rated star 4 rated star 5
  • Rate this craft
  • Rated by 7 members
Total Time Needed:
1 Hour
Crayonists can use their sharpener's shavings to create colorful window ornaments.
Materials
  • Waxed paper
  • Crayons
  • Sharpener or paring knife
  • Scissors
  • Clothes iron
Instructions
  1. Collect shavings from a crayon sharpener, or use a cheese grater for big crayons.
  2. Arrange and sandwich the shavings between two sheets of waxed paper. You can also make a collage of found objects inside the waxed paper sandwich, placing string, lace or cutout letters among the shavings.
  3. Iron the whole package on low (parents only), just until the shavings melt. Cut the stained glass into shapes and hang them in a sunny window.


    Glassy I.D.

    An easy-to-make but dazzling mosaic
     From FamilyFun Magazine
    • rated star 1 rated star 2 rated star 3 rated star 4 rated star 5
    • Rate this craft
    • Rated by 0 members
    Total Time Needed:
    1 Hour
    Glass gems — also called blobs, nuggets, and flattened marbles — can be found in the floral section of craft stores. Use these jewel-like whatchamacallits in this beginner mosaic project. We arranged the gems into a letter, but you can also form a number, a simple picture, or an abstract pattern.
    Materials
    • Picture frame
    • Hot glue
    • Multicolored glass gems
    • Tacky glue
    • 2 screw eyes
    • Monofilament
    Instructions
    1. Remove the backing from a picture frame and place the frame (with its glass) face down. Secure the glass to the frame with hot glue.
    2. Turn the frame right side up and arrange multicolored glass gems on the glass. When you have the gems where you want them, attach them to the glass, one by one, with a small dab of tacky glue.
    3. Glassy I.D. - Step 3 After the glue dries, add a pair of screw eyes to the back of the frame as shown, and tie on a length of monofilament for hanging.
    Tips:
    This mosaic idea originally appeared in Glittering Shards, a blog written by Concetta Perot, a London-based artist and mom of two. Go toglitteringshards.com and click on "blog" for more.