Showing posts with label Shape. Show all posts

Wednesday, March 9, 2011

Value, Texture and Shape

VALUE

I (Suzanne) was asked to share a couple of projects I've been doing for Art Mom.  I do art for a 1st and 2nd grade class.

I'm all about letting the kids imagination go wild when it comes to art!  I'm constantly telling the kids that there is no wrong in Art.  They can't mess up because it's what there imagination comes up with that creates the art!

The first project was on Value.  Value was something hard for me to explain but easy to see.   First I asked the kids if I colored with a pencil would the color ever be different then black (dark grey)?  There were some yes' and no's. I then took a plane white piece of paper and with a pencil scribbled back and forth pressing hard to make the color darker then as I went along the paper I used less force while pressing making the color lighter.

For this project we used black and white paper.  "Black and white offer a striking contrast when used together and create a strong visual image." (How to Teach Children Art by:Evan-Mor)

1. Give each child one piece of black and one white piece of paper.  (Pre cut the white paper to half the size of the black).  Have children draw 4 different lines on the white paper. (For younger kids you may want to pre draw the lines for them or have them follow along as you draw on the chalk board.)  The key to making this successful is to draw BIG.  Some of the kids drew their shapes to little making it very difficult to cut.

2. Have students then spread the white stripes across the black paper.

3. Let students experiment with variations and then glue the white strips in place.


****Just remember bigger shapes work best for this project especially when working with younger children.****


TEXTURE 

For my lesson on texture I cut out several different shapes and textured some of them (my sister has a machine that can do this, but no worries this isn't the only way you can texture stuff!) I gave each student a couple of different sizes and shapes of paper. 

Now here's the fun part...I told them to let there imaginations go wild, they could cut, tare, crumple, wrinkle, roll or whatever else they thought of so they could create the picture they had in their mind on the paper in front of them. Here's what they came up with.


This little girl wrote her mother's name!

This is a rain storm in the ocean! They tore the pieces of paper really small and waded them up real small to make rain!  Genuis!!!

This is the ocean!

We've also talked about how some artist name their artwork so each month the kids have been coming up with names for the artwork.  It's been really fun to see their creative minds work!!!  This has been my most  favorite project!


SHAPE
I cut out triangle and circle shapes.  Each child got to choose one shape.  I told them to think about what they wanted to create with their shape and then position it accordingly on their paper.  There are some real creative minds out there.  In years past I've had kids use a circle as a cat's face and drew the whole body around it.  Or a triangle as the tip of the space shuttle.  Here are this year's creations:

Climbing Mountains
Flower Power
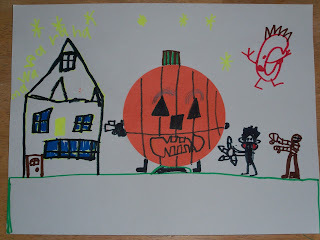
Anyone for trick or treating?  We did this project right before Halloween so it was definitly an ongoing theme.


Tuesday, October 19, 2010

Haunted House Shapes


In my time in the class room this month we are going to be making a haunted house with many silhouettes in the windows and in the sky.  In thinking about the design for a haunted house, I went to google images and found myself some fun examples.  We are going to use one of the class room doors to decorate, so this will be a large class contribution.  I just though I would post this if anyone would like to use it as well.
Thank you for your time today.


Wednesday, October 13, 2010

Simple Squares


Who is that you see in the picture above? 


If you guessed President Abraham Lincoln you are right. 
I like the idea that you can create a picture of someone with just simple squares.
You notice that the picture is all black, gray and white.
Wouldn't it be fun to divide a sheet of white paper into squares and have the children shade each square in a way to make a picture of something?  I wonder what they would decide to make.  Or maybe we could give them a picture of their teacher or an apple or a flag on a flagpole. 


Shape is something that can be so simple. 
Have fun.

Silhouettes

This lesson I found in a book I have titled Paste, Pencils, Scissors and Crayons. 

You need:
  • two pieces of paper of contrasting colors (one or both of which could be black and/or white, but needn't be.)
  • Scrap pieces in the same contrasting colors
  • pencil
  • scissors
  • glue
A silhouette lesson is fun and highly decorative BUT it is not an easy lesson to present without a few sample silhouettes to use as examples.  So before you try to introduce the silhouette concept, I would highly recommend that you take the time to locate some samples or better yet, make a few yourself.


When teaching how to do a silhouette, rememer these basic ideas....
1. Silhouettes need a low groundline.
2. Some views make better silhouettes than others-with people and animals, sideviews are generally better.   Some complicated things like houses are best translated into simple views. You can't really put much detail into a silhouette.
3. Also point out to your class that silhouettes can be just as easily done with white on black as with black on white. 
4. When you have finished paving the way, turn your class loose on a silhouette of their own invention.  The results will delight you.


Halloween time is a very popular time to do silhouettes.  Just think of all the cats, bats, ghosts, haunted houses, witch profile in the moon, & jack-o-lanterns.  I think it would even be cool to do a few leaves at the end of a small branch for fall, or a side view of a turkey for thanksgiving.

Good luck!

Tuesday, October 12, 2010

Great Examples

Mondrian Grey Tree
The Gray Tree by Piet Mondrian

"Negative space need not be boring.  This tree is a great example of that.  Mondrian attracts our attention  to the negative areas with this brushwork, an makes these shapes as much the subject of the painting as the form of the tree."
-Design Basics


A 1921 painting by Piet Mondrian:
By Piet Mondrian


This piece by Piet Mondrian is a fun example of shape.  If you think your students would like to do something like this the book How to Teach Art to Children has instructions on how to do so on pages 112 & 113.


     The Violin by Juan Gris

This piece of the Violin is excellent to show what shape can do in art.  Notice the amount of rectangles.  Then just by using the one object with rounded sides (the violin) he makes that his focal point. It is the first thing your eye looks at. How simple.


These three drawings by Gorges Seurat are demonstrating three types of positive/negative shapes with shading.  If you are interested in teaching a little more on this type of an idea, I would be happy to help you out, just let me know.


Negative Space Leaves


Go to this link to find out how to do this fun leaf assignment.

Leaf Silhouettes by Robert A. Sloan


Negative Shape/Space Lesson


Today I am going to give you plenty of examples of what this is.

When I first started teaching students about negative shape I would use my hands as an example.   

After making a heart shape with my hands I asked them what they shape they could see.


Changing my hands position I asked them what they now could see.


Heart and Heart should have been the answers.

Negative shape in art is a lot like that. 

The artist works on the space around the shape that they would like you to really see.  Usually in the negative shape or space there is no drawing or coloring.  It is just a blank space.


Can you see the vase?  Now can you see the man's profile in the negative space?
The vase is the postitive space and the profiles are in the negative space.


In this example what is the negative space?  The cat or the dog?
The dog is the positive space and the cat is the negative space.

This is another example of negative shape/space.  The 2 & 3 are the negative space but they are very easy to see.  Can you see how those numbers are part of the background?  The space around any object being painted or drawn is negative space.


The black cat in this picture is in the negative space, because it part of the background.


The picture of this girl is an excellent example of positive and negative shapes.  
If you follow this link it could teach you a little more about shape.


This is a famous logo that uses negative space.  
The peacocks neck and beak are what you see as negative shape.


Lo-Res Chair
This chair has negative space of a very comfortable chair, but the actual sitting of the chair may be very uncomfortable.


The great challenge now is to try to get your students to use negative space in their art.  

I have posted an example of a haunted house that I did with a third grade class last year. 
Scroll down and check it out.


"Lines create the outline of shapes.  Each time a line outlines a shape, it is really creating two images: the positive one and a negative one." -How to Teach Art to Children


If you were to think about maybe what a negative shape would be, what would you see?

Halloween Negative Shape

 Last year I worked with a third grade class and in October we did a fun Shape activity.    First I taught the kids about positive and negative shapes (I will post a lesson on that in a bit.) then we made a haunted house using that concept.  I gave each child three pieces of  construction paper, one large black (house), one large purple (background), and 1/2 of an orange piece (accents, i.e. pumpkin, ghost, moon). I had a lot of fun seeing what each child produced and all of the pieces looked pretty scary.  I think the kids were pretty impressed with their work as well!


This was my example I showed them.

The door, sidewalk, and grass are all negative shape/space.  The moon, cat, house, ghost and pumpkin are all positive shapes/space.

Shape Assignment Ideas


This month my emphasis is the art element of Shape.  I have a couple of very simple ideas. 
#1. Give each child a white piece of construction paper and a simple shape (I used a circle).  The assignment is to incorporate the shape into a drawing.  Glue down the circle where ever they would like then draw a picture with the circle as part of the drawing. Some examples would be an eyeball, the top of an ice cream cone, the cener of a flower, a tire on a car, the head of a bird, the sun, a clock in a classroom.  I encouraged the students to try to fill the whole page as much with color as they could, usually great art doesn't have a lot of white.
The green machine


A Castle and a Happy Face.  Artist, my five-year-old daughter


#2. Give each child a large dark blue piece of construction paper, a large orange piece,  and a half a piece of yellow.  Have the children cut out the shapes of  a jack-o-lantern (orange the pumpkin, yellow the eyes, nose and mouth, and the blue for the background.) then glue to the blue.  Create some fun texture with line as you have the children use a crayon to draw one continuous line around the eyes, nose and mouth. They are not allowed to cross over a line, but may make a U-turn and go another direction.  Fill up the pumkin with line. 


#3.  Using leaves have the children create a shape like in assignment #1 and create a halloween/autumn scene. 
 
#4.  I think it would be fun with an older group of children to bring in a long piece of butcher paper and ask them to create a mural with many shapes.  Get the class divided into groups and give 2 shapes per group and an area on the butcher paper they are assigned.  Give them an over all theme to use for the mural and see what is created.  This would be fun just to see what team work can create. 
 
Remember to encourage them to think of their own ideas, not to copy their neighbor.  Art has no wrong answers so cheating would just be silly.  Also remember that if you are excited, they will be excited.  Thanks for your hard work and time.  Have fun!
 
-Camille
 

If you have any other fun ideas let me know so that we can all  share together.
Thanks again.