I (Suzanne) was asked to share a couple of projects I've been doing for Art Mom. I do art for a 1st and 2nd grade class.
I'm all about letting the kids imagination go wild when it comes to art! I'm constantly telling the kids that there is no wrong in Art. They can't mess up because it's what there imagination comes up with that creates the art!
The first project was on Value. Value was something hard for me to explain but easy to see. First I asked the kids if I colored with a pencil would the color ever be different then black (dark grey)? There were some yes' and no's. I then took a plane white piece of paper and with a pencil scribbled back and forth pressing hard to make the color darker then as I went along the paper I used less force while pressing making the color lighter.

For this project we used black and white paper. "Black and white offer a striking contrast when used together and create a strong visual image." (How to Teach Children Art by:Evan-Mor)
1. Give each child one piece of black and one white piece of paper. (Pre cut the white paper to half the size of the black). Have children draw 4 different lines on the white paper. (For younger kids you may want to pre draw the lines for them or have them follow along as you draw on the chalk board.) The key to making this successful is to draw BIG. Some of the kids drew their shapes to little making it very difficult to cut.
2. Have students then spread the white stripes across the black paper.
3. Let students experiment with variations and then glue the white strips in place.


****Just remember bigger shapes work best for this project especially when working with younger children.****
TEXTURE
For my lesson on texture I cut out several different shapes and textured some of them (my sister has a machine that can do this, but no worries this isn't the only way you can texture stuff!) I gave each student a couple of different sizes and shapes of paper.
Now here's the fun part...I told them to let there imaginations go wild, they could cut, tare, crumple, wrinkle, roll or whatever else they thought of so they could create the picture they had in their mind on the paper in front of them. Here's what they came up with.

This little girl wrote her mother's name!

This is a rain storm in the ocean! They tore the pieces of paper really small and waded them up real small to make rain! Genuis!!!

This is the ocean!

We've also talked about how some artist name their artwork so each month the kids have been coming up with names for the artwork. It's been really fun to see their creative minds work!!! This has been my most favorite project!
SHAPE
I cut out triangle and circle shapes. Each child got to choose one shape. I told them to think about what they wanted to create with their shape and then position it accordingly on their paper. There are some real creative minds out there. In years past I've had kids use a circle as a cat's face and drew the whole body around it. Or a triangle as the tip of the space shuttle. Here are this year's creations:

Climbing Mountains

Flower Power
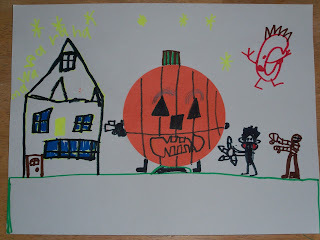
Anyone for trick or treating? We did this project right before Halloween so it was definitly an ongoing theme.
No comments:
Post a Comment